Crateria Power Bomb Room
Room ID: 28
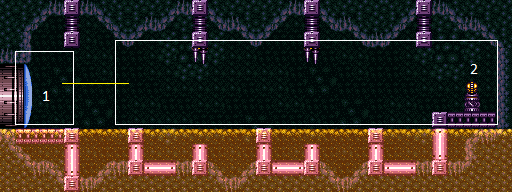
|
Exit condition: "leaveWithRunway": {
"length": 4,
"openEnd": 1
} |
From: 1
Left Door
To: 1
Left Door


Wait for the Alcoon to walk off and reach the bottom of the slope. Dodge it's fireballs with Morph or Screw, or simply freeze it and wait while standing behind it. Keep a half-tile gap between the Alcoon and the runway in order to extend the runway as much as possible. Requires: "h_frozenEnemyRunway" Exit condition: "leaveWithRunway": {
"length": 6,
"openEnd": 0
} |
|
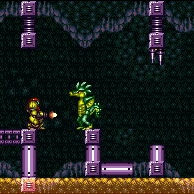

The Alcoons have a 99.5% Power Bomb drop rate, after which they only drop small energy. Requires: {"resetRoom": {"nodes": [1]}},
{"or": [
{"and": [
{"or": [
"ScrewAttack",
{"ammo": {"type": "Missile", "count": 3}}
]},
{"cycleFrames": 575}
]},
{"and": [
"Plasma",
{"cycleFrames": 650}
]},
{"and": [
{"or": [
"Wave",
"Spazer"
]},
{"cycleFrames": 1000}
]},
{"and": [
{"or": [
"canDodgeWhileShooting",
"Ice"
]},
{"cycleFrames": 1210}
]}
]}Farm cycle drops: 3 Alcoon |
|
Requires: "h_CrystalFlash" |
From: 1
Left Door
To: 1
Left Door


Entrance condition: "comeInShinecharging": {
"length": 4,
"openEnd": 0
}Requires: {"or": [
"Plasma",
{"ammo": {"type": "Missile", "count": 1}},
{"ammo": {"type": "Super", "count": 1}},
{"and": [
"Charge",
"Ice",
"Wave",
"Spazer"
]},
{"and": [
"canShinechargeMovementTricky",
{"shineChargeFrames": 175}
]}
]},
"canMidAirMorph",
"h_spikeSuitSpikeHitLeniency",
{"spikeHits": 1},
"canTrickySpikeSuit",
{"shinespark": {"frames": 1, "excessFrames": 1}} |
From: 1
Left Door
To: 1
Left Door


Entrance condition: "comeInShinecharged": {}Requires: {"or": [
{"and": [
"Plasma",
{"shineChargeFrames": 160}
]},
{"and": [
"Ice",
"Plasma",
{"shineChargeFrames": 105}
]},
{"and": [
"Wave",
"Plasma",
{"shineChargeFrames": 120}
]},
{"and": [
"Charge",
"Ice",
"Wave",
"Spazer",
{"shineChargeFrames": 105}
]},
{"and": [
{"or": [
{"ammo": {"type": "Missile", "count": 1}},
{"ammo": {"type": "Super", "count": 1}}
]},
{"shineChargeFrames": 130}
]},
{"and": [
"canShinechargeMovementTricky",
"canInsaneJump",
{"shineChargeFrames": 105}
]}
]},
"canMidAirMorph",
"h_spikeSuitSpikeHitLeniency",
{"spikeHits": 1},
"canTrickySpikeSuit",
{"shinespark": {"frames": 1, "excessFrames": 1}} |
From: 1
Left Door
To: 1
Left Door
Entrance condition: "comeInShinecharging": {
"length": 3,
"openEnd": 0
},
"comesInHeated": "no"Requires: {"or": [
"h_CrystalSpark",
{"and": [
"h_enemyDrops",
"canBePatient",
"h_CrystalSparkWithoutLenience"
]}
]}Dev note: No lenience, because Power Bombs can be farmed from the Alcoons. |
|
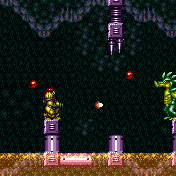

Duck under the first two Alcoon shots, or retreat back a platform to fight them with Power Beam. Requires: {"or": [
"canDodgeWhileShooting",
{"enemyDamage": {"enemy": "Alcoon", "type": "fireball", "hits": 3}},
{"enemyKill": {
"enemies": [["Alcoon", "Alcoon"], ["Alcoon"]],
"excludedWeapons": ["PowerBeam", "Bombs"]
}}
]}Dev note: All the Alcoons are assumed killed in each case. |
|
|