canSuperjump (Insane)


Ability to Shinespark while in XMode in a controlled way. A side effect of Superjumping is that Samus gains a Blue Suit.
Dependencies: canXModeBlueSuit, canXMode, canCarryBlueSuit
Strats ()
From: 1
Top Left Door
To: 6
Right of Morph Tunnel with Temporary Blue
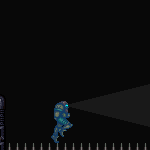

Use X-Mode to store a spikesuit, and then convert that to a blue suit with more X-Mode. By bouncing on the ledge and arm pumping a few tiles in the first X-Mode, it is possible to reach the right with a horizontal damage boost and only a single additional spike hit after the superjump. Requires: {"notable": "In-Room X-Mode BlueSuit"},
"canSuperjump",
"h_XModeSpikeHit",
"h_XModeSpikeHit",
"h_XModeSpikeHit",
"h_shinechargeMaxRunway",
{"shinespark": {"frames": 5}},
"h_XModeSpikeHit",
{"or": [
{"and": [
"h_XModeSpikeHit",
"h_XModeSpikeHit"
]},
{"and": [
"SpaceJump",
"h_XModeSpikeHit"
]},
"Grapple"
]} |
From: 1
Top Left Door
To: 6
Right of Morph Tunnel with Temporary Blue
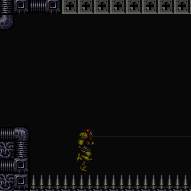

Enter with a shinespark ready, activate XMode by bouncing into the spikes, then activate the shinespark but release XMode during the shinespark windup animation. Entrance condition: "comeInShinecharging": {
"length": 4,
"openEnd": 1
}Requires: "canSuperjump", {"shinespark": {"frames": 7, "excessFrames": 0}}, "h_XModeSpikeHit", {"or": [ {"and": [ "h_XModeSpikeHit", "h_XModeSpikeHit" ]}, {"and": [ "h_XModeSpikeHit", "SpaceJump" ]}, "Grapple" ]} Dev note: There is 1 unusable tile in this runway. |
From: 3
Bottom Left Door
To: 2
Top Right Door


By bouncing far enough left, it is possible to get a 2-frame window for the X-mode. Entrance condition: "comeInShinecharged": {}Requires: {"shineChargeFrames": 135},
{"thornHits": 1},
{"or": [
{"thornHits": "n_thornXModeLenience"},
"canTrickyDodgeEnemies",
{"enemyKill": {
"enemies": [["Beetom", "Beetom"]],
"excludedWeapons": ["Bombs"]
}}
]},
"canSuperjump",
{"shinespark": {"frames": 4, "excessFrames": 0}}Dev note: FIXME: add a comeInShinecharging variant. |
From: 3
Bottom Left Door
To: 2
Top Right Door
By bouncing far enough left, it is possible to get a 2-frame window for the X-mode. Requires: {"or": [
"h_thornDoubleXModeBlueSuit",
{"and": [
"h_thornDoubleXModeBlueSuitWithoutLenience",
{"or": [
{"obstaclesCleared": ["A"]},
"canTrickyDodgeEnemies",
{"enemyKill": {
"enemies": [["Beetom", "Beetom"]],
"excludedWeapons": ["Bombs"]
}}
]}
]}
]},
"canSuperjump",
{"shinespark": {"frames": 4, "excessFrames": 0}} |
From: 1
Left Door
To: 3
Top Junction


A one frame dash jump will give Samus maximum leniency for bouncing into the spikes without hitting the wall to build a shinecharge Requires: "canSuperjump", {"obstaclesCleared": ["A"]}, {"obstaclesCleared": ["B"]}, "h_destroyBombWalls", "canBeVeryPatient", "h_spikeDoubleXModeBlueSuit", {"shinespark": {"frames": 2}} Resets obstacles: C |