canManipulateMellas (Very Hard)

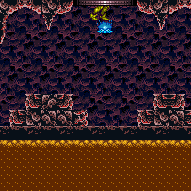
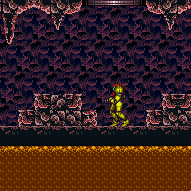
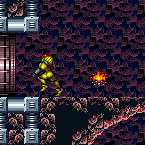
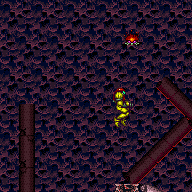
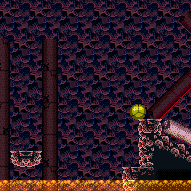
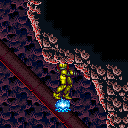
The ability to manipulate bug enemies that moves in a diving pattern (Mella, Mellow, or Menu). These enemies inch upwards or downwards with each dive, so making it dive repeatedly can put it at the proper height to execute a strat. Most commonly, it is desired for the enemy to move upward as much as possible per swoop. One way to achieve this is to make the enemy target Samus on the same frame that it first becomes active; this can be done by moonwalking toward the enemy, in order to prevent the enemy from coming on camera until it is in range to target Samus.
Dependencies: canUseEnemies
Dev note: There are two reasons why these enemies inch up or down: 1. When idle, the enemy moves in a figure-eight pattern with a period of 32 frames; after swooping, it has a cool-down of 24 frames of the idle pattern before swooping again (assuming Samus stays in range); this means it doesn't complete a full revolution over those 24 frames, so depending on the phase in the cycle when it swoops it will have either a gain or loss of height; as long as Samus stays in range, the pattern will be locked in such a way that it continues to gain or lose the same amount of height in this way with each swoop; the initial phase of the enemy on room entry happens to be optimal for making it move up as much as possible, which is why the moonwalk camera manipulation works. 2. The enemy spends one more frame 'retreating' from the swoop compared to the 'approaching' part of the swoop; so assuming Samus is below the enemy when targeted, this gives it an overall tendency to move upward; this effect will be maximized by making the enemy swoop as close to vertically as possible. Additional technical details: The phase is stored in variable $0FB0 (for enemy index 0), and after one cycle with Samus in range, will always have one of nine possible values: $00, $20, $40, $60, $80, $A0, $C0, $E0, or $100. These result in a maximum upward displacement (in pixels) per swoop of +3.98, +2.07, +0.43, -0.65, -1.03, -0.65, +0.43, +2.07, +3.98 respectively. With consecutive swoops, the phases alternate in pairs: $00 alternating with $100, $20 with $E0, $40 with $C0, $60 with $A0, and $80 with itself; both phases in each pair result in the same displacement.
Strats ()
From: 7
Junction Below Power Bomb Blocks
To: 2
Middle Left Door
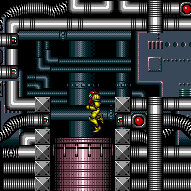
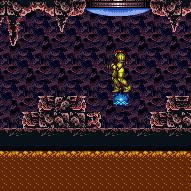
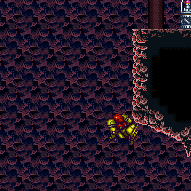
Bring a Mella on-camera while moonwalking, to set it up to move upward at the maximum rate (about 4 pixels per swoop). Guide it to a horizontal position inside the left wall below the Power Bomb blocks. When it is high enough, freeze it as it retreats from a near-vertical swoop. Get into position on the ledge below the Power Bomb blocks and wait for the Mella to thaw. Freeze the it inside the wall as it continues its retreat upward, by jumping and firing a downward shot. Run into the wall to clip into it. Crouch and destroy the Mella by shooting up (by holding angle up and angle down) Then X-Ray climb above the Power Bomb blocks. Requires: {
"notable": "Mella Wall Ice Clip X-Ray Climb"
}
"canManipulateMellas"
"canWallIceClip"
"canXRayClimb" |
From: 2
Right Vertical Door
To: 2
Right Vertical Door
It can help to moonwalk towards a Mella that has never been on screen, so that it starts swooping immediately as it first enters the screen. This will make it so that when Samus is below it, it will always swoop and go up slightly compared to the previous swoop. Once it is close to the right height, move away so it stops swooping, freeze it and quickly try the clip, if it doesn't work, quickly leave and try again. Entrance condition: {
"comeInWithGMode": {
"mode": "indirect",
"morphed": false
},
"comesThroughToilet": "any"
}Requires: "canComplexGMode"
"canManipulateMellas"
{
"or": [
"h_preciseIceClip",
"h_highPixelIceClip"
]
}
"canInsaneJump"
{
"or": [
"Morph",
"canTrickyGMode",
{
"enemyDamage": {
"enemy": "Mella",
"type": "contact",
"hits": 1
}
}
]
}Exit condition: {
"leaveWithGMode": {
"morphed": false
}
}Bypasses door shell: true Dev note: This is only for indirect G-Mode, because it is trivial while in direct, and would use a different strat. |
From: 2
Right Vertical Door
To: 2
Right Vertical Door
The easiest way to set up G-mode is to lure a low Mella to the door, take a hit, then jump and aim down and freeze it while it is high enough and still rising. If the Mella is not moving upwards, there is a good chance that Samus will be in a falling state as she is hit through the transition and can't use X-Ray. If Samus does not stay on the Mella, she can spin jump or midair morph directly onto the Mella without touching the transition. It may be worthwhile to keep the other Mellas alive so that on a failed attempt, Samus can freeze the Mella to go farm some of the others in room. Requires: "canManipulateMellas" "canUpwardGModeSetup" "canTrickyUseFrozenEnemies" "canInsaneJump" Exit condition: {
"leaveWithGModeSetup": {}
} |
From: 2
Right Vertical Door
To: 2
Right Vertical Door
Freeze a Mella at a precise distance below the door in order to crouch-jump up and clip through the door shell. The pixel window is larger and higher with Morph and an X-Ray stand-up, in which case a standing jump is used. It can help to moonwalk towards a Mella that has never been on screen, so that it starts swooping immediately as it first enters the screen. This will make it so that when Samus is below it, it will always swoop and go up slightly compared to the previous swoop. Once it is close to the right height, move away so it stops swooping, freeze it and quickly try the clip, if it doesn't work, quickly leave and try again. Requires: "canManipulateMellas"
"h_iceClip"
{
"or": [
"Morph",
"canInsaneJump",
{
"enemyDamage": {
"enemy": "Mella",
"type": "contact",
"hits": 1
}
}
]
}Bypasses door shell: true |
|
Lure a Mella from the right by breaking the speed blocks or using Morph. Then you need to manipulate it to go high enough to be used as a stepping stone once frozen. Requires: "canTrickyUseFrozenEnemies"
"canManipulateMellas"
{
"or": [
"canTrickyDodgeEnemies",
{
"enemyDamage": {
"enemy": "Mella",
"type": "contact",
"hits": 2
}
}
]
}
{
"or": [
{
"obstaclesCleared": [
"B"
]
},
"Morph"
]
} |
From: 5
Small Platforms Junction
To: 1
Left Door
Lure a Mella from the right by breaking the speed blocks or using Morph. Then manipulate it to go high enough to be used in the left doorway. Raise the Mella up to just below the door's ledge and then climb up to the door. Reposition the Mella once towards the door, and before it finishes moving, stand in the doorframe so that the next Mella movement will hit Samus. If it drops below the camera it will be necessary to go back down and raise it again. Requires: "canManipulateMellas"
"canCameraManip"
"canBePatient"
"canComplexGMode"
{
"or": [
"SpaceJump",
"canTrickyUseFrozenEnemies",
{
"and": [
"HiJump",
"canSpringBallJumpMidAir"
]
},
{
"and": [
"HiJump",
"canSpeedyJump",
"canTrickyWallJump"
]
}
]
}
{
"or": [
"canTrickyDodgeEnemies",
{
"enemyDamage": {
"enemy": "Mella",
"type": "contact",
"hits": 2
}
}
]
}
{
"or": [
{
"obstaclesCleared": [
"B"
]
},
"Morph"
]
}Exit condition: {
"leaveWithGModeSetup": {}
}Unlocks doors: {"types":["ammo"],"requires":[]} |
|
Lure a Mella from the right by breaking the speed blocks or using Morph. Then manipulate it to go high enough to be used as a stepping stone once frozen. Without movement items it may be necessary to continue manipulating it from above, jumping and aiming down to freeze it. Requires: "canTrickyUseFrozenEnemies"
"canManipulateMellas"
"canBePatient"
{
"or": [
"canWallJump",
"HiJump",
"canSpringBallJumpMidAir",
{
"and": [
"canBeVeryPatient",
{
"noFlashSuit": {}
}
]
}
]
}
{
"or": [
"canTrickyDodgeEnemies",
{
"enemyDamage": {
"enemy": "Mella",
"type": "contact",
"hits": 2
}
}
]
}
{
"or": [
{
"obstaclesCleared": [
"B"
]
},
"Morph"
]
} |
|
Lure a Mella from the right by breaking the speed blocks or using Morph. Then you need to manipulate it to go high enough to be used as a stepping stone once frozen. Requires: "canManipulateMellas"
"canTrickyUseFrozenEnemies"
"HiJump"
{
"or": [
"canTrickyDodgeEnemies",
{
"enemyDamage": {
"enemy": "Mella",
"type": "contact",
"hits": 2
}
}
]
}
{
"or": [
{
"obstaclesCleared": [
"B"
]
},
"Morph"
]
}
{
"or": [
"canWallJump",
"canSpringBallJumpMidAir"
]
} |
|
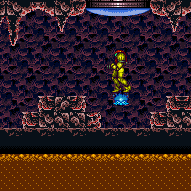
Freeze the Mella at a precise location in order to jump through the crumble block, then wall jump up the long channel and mid-air morph to get out. One normalized way to do this: Kill the first two Mellas, moonwalk to the right until the third Mella just barely goes off-camera, fire a shot, and move left to scroll the Mella back on-camera just before the shot would despawn, in order to freeze it at a specific height. While it is frozen, kill the remaining Mellas, and press against the wall of Speed blocks. Perform an action that changes Samus' pose (e.g., press an angle button, jump, or crouch/uncrouch) in order to be able to moonwalk from that position. Moonwalk backwards 5 pixels, then jump straight up, and continue holding jump while pressing right, to perform a buffered turn-around spin jump to the right. If executed correctly, the Mella will move horizontally left and will be at a good height to be able to freeze and clip through the crumble block with a crouch jump. Get on top of the Mella with a mid-air morph, position under the crumble block, then unmorph for the crouch jump. Quickly spin-jump to re-enter the shaft after breaking the crumble block. Tip: if Samus moonwalks back further than 5 pixels, press against the Speed blocks again before trying to moonwalk back again, to avoid possibly getting bad subpixels. Requires: {
"notable": "Mella Ice Clip"
}
"Morph"
"canMoonwalk"
"canManipulateMellas"
"h_preciseIceClip"
{
"or": [
"canConsecutiveWallJump",
{
"and": [
"HiJump",
"canWallJump"
]
}
]
}Dev note: The manipulation can also work with moonwalking back between 6 and 10 pixels, but depending on the exact position the bug may move at a shallow angle rather than exactly horizontally; in this case, the bug should be frozen a bit early (i.e. further right), to ensure it does not re-enter its idle animation where its height would become unpredictable. FIXME: Investigate if there is a normalized setup for freezing in the high-pixel position. FIXME: A freestyle version (or alternative normalized setup?) of the strat could be added, to avoid the canMoonwalk requirement, using X-Ray or a very precise freeze to get up. |
From: 6
G-Mode Morph Junction (At Speed Blocks)
To: 2
Right Vertical Door
It can help to moonwalk towards a Mella that has never been on screen, so that it starts swooping immediately as it first enters the screen. This will make it so that when Samus is below it, it will always swoop and go up slightly compared to the previous swoop. Once it is close to the right height, move away so it stops swooping, freeze it and quickly try the clip, if it doesn't work, quickly leave and try again. Requires: "canComplexGMode"
"canManipulateMellas"
{
"or": [
"h_preciseIceClip",
"h_highPixelIceClip"
]
}
{
"or": [
"Morph",
"canInsaneJump",
{
"enemyDamage": {
"enemy": "Mella",
"type": "contact",
"hits": 1
}
}
]
}Exit condition: {
"leaveWithGMode": {
"morphed": false
}
}Bypasses door shell: true |
From: 1
Left Door
To: 1
Left Door

Open the door and get into position, jump and aim down then walk through the door. If Samus is not able to reset the room, get close to the door with a vertically swooping Menu. Move forwards slowly luring it to the doorway. Requires: "canManipulateMellas" Exit condition: {
"leaveWithGModeSetup": {}
} |