Cathedral Entrance: Leave Shinecharged Hero Shot
Room ID: 90
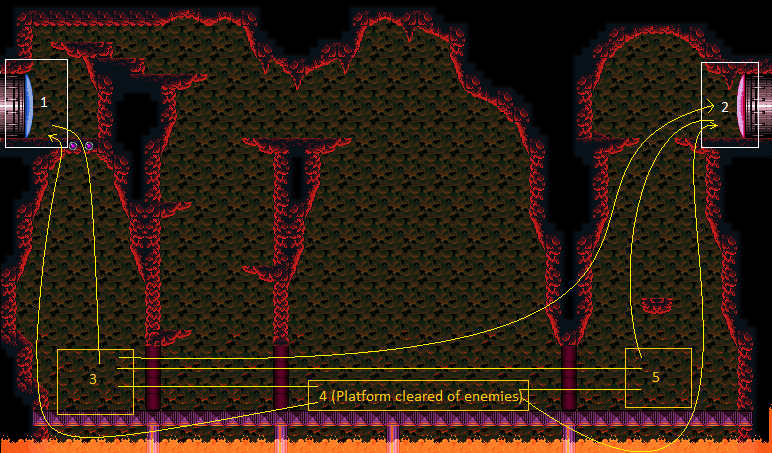
From: 4
Bottom Junction (Cleared Runway)
To: 1
Left Door


Kill the enemies, then use the bottom to charge a spark. Shoot the shot block from the ground and follow it up so that it breaks, and continue through the left door. Requires: "canShinechargeMovementTricky", "canHeroShot", {"canShineCharge": {"usedTiles": 43, "openEnd": 0}}, {"heatFrames": 155}, {"or": [ "canInsaneJump", "h_heatProof" ]}, {"or": [ {"and": [ "HiJump", "canPreciseWallJump", {"heatFrames": 150}, {"shineChargeFrames": 150} ]}, {"and": [ "HiJump", "SpaceJump", {"heatFrames": 150}, {"shineChargeFrames": 150} ]}, {"and": [ "HiJump", "canSpeedyJump", "canTrickyJump", {"heatFrames": 160}, {"shineChargeFrames": 160} ]}, {"and": [ "canPreciseWallJump", {"heatFrames": 160}, {"shineChargeFrames": 160} ]} ]} Exit condition: "leaveShinecharged": {}Unlocks doors: {
"types": ["missiles"],
"requires": [{"heatFrames": 500}]
},
{"types": ["super"], "requires": []},
{
"types": ["powerbomb"],
"requires": [{"heatFrames": 180}]
}Dev note: FIXME: The heat frames could be tightened by running straight through the room, depending on available ammo/weapons for dealing with the Sm. Dessgeegas. |