Mickey Mouse Room: HeatProof Kill
Room ID: 144
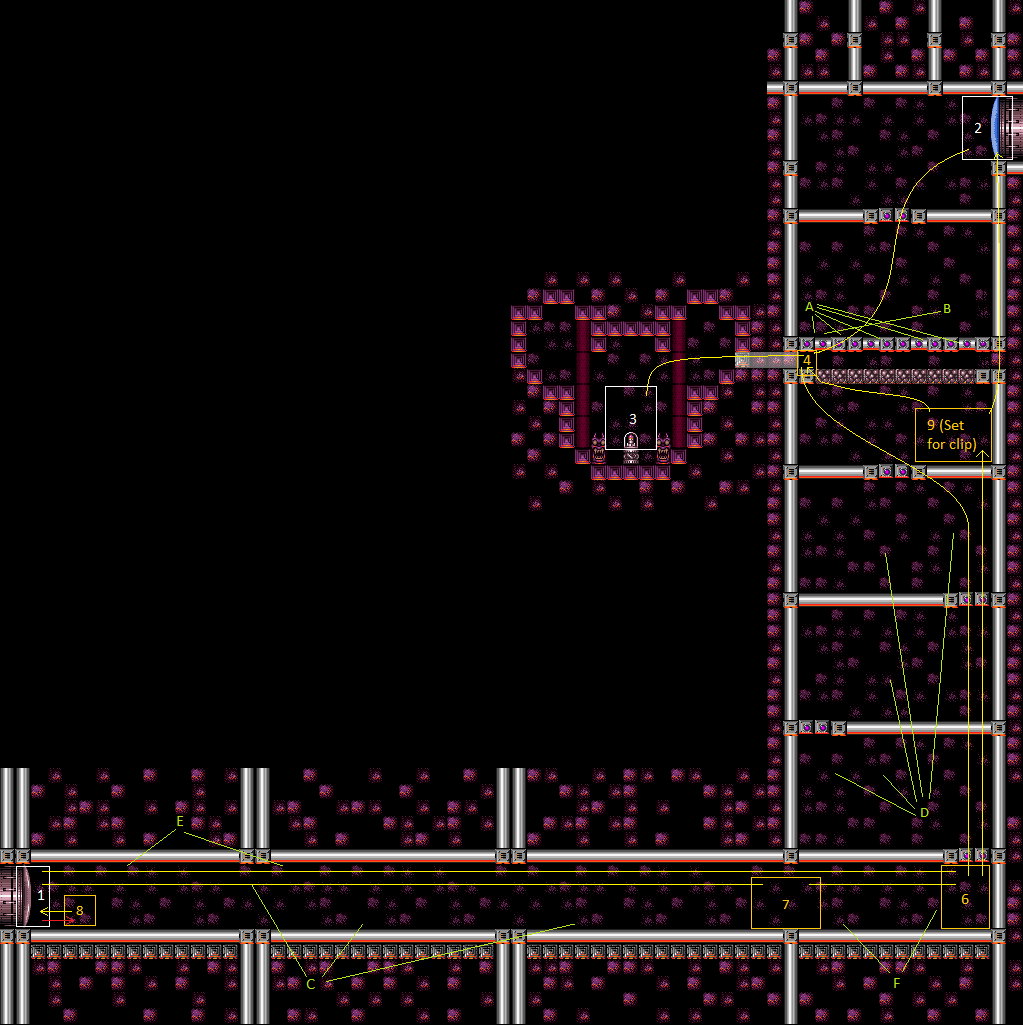
From: 7
Junction Left of Two Rightmost Dessgeegas
To: 1
Bottom Left Door
Some weapons are very slow at killing the Multiviolas and require use of the safe spot in the bottom right Multiviola cage. Requires: "h_heatProof", {"obstaclesCleared": ["F"]}, {"or": [ {"and": [ "canDodgeWhileShooting", {"enemyKill": { "enemies": [["Dessgeega"], ["Dessgeega"], ["Dessgeega"]], "excludedWeapons": ["Bombs", "PseudoScrew", "Charge", "Charge+Ice", "Spazer"] }} ]}, {"and": [ "canBeVeryPatient", "Charge" ]}, {"and": [ "canBePatient", "Charge", "Ice" ]}, {"and": [ "canBePatient", "Spazer" ]}, {"obstaclesCleared": ["C"]} ]}, {"or": [ {"and": [ "canCarefulJump", {"enemyKill": { "enemies": [["Multiviola"], ["Multiviola"]], "excludedWeapons": ["Bombs", "PowerBeam"] }} ]}, {"enemyDamage": {"enemy": "Multiviola", "type": "contact", "hits": 2}}, {"obstaclesCleared": ["E"]} ]} Clears obstacles: C, E Unlocks doors: {
"types": ["missiles"],
"requires": [{"heatFrames": 30}]
}Dev note: Bombs are excluded because there is no safe setup. Without canDodgeWhileShooting, tanking the damage and running through is best. |