Red Tower: IBJ Between the Bottom Rippers (Extreme)
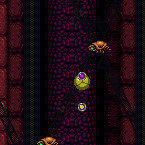
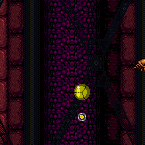
Requires switching between single and double IBJs. While Doubles are not techincally necessary, they make the strat more bearable.
Strats ()
From: 3
Bottom Left Door
To: 2
Middle Left Door (Behind Power Bomb Blocks)
Requires switching between single and double IBJs. While Doubles are not techincally necessary, they make the strat more bearable. Exit G-Mode before the Power Bomb explodes in order to break the wall. With an extra Power Bomb, it may be worthwhile to use it to kill some of the Rippers. Entrance condition: {
"comeInWithGMode": {
"mode": "any",
"morphed": true
}
}Requires: {
"notable": "IBJ Between the Bottom Rippers"
}
"h_artificialMorphDoubleBombJump"
"h_artificialMorphStaggeredIBJ"
"h_artificialMorphPowerBomb"
"h_artificialMorphLongIBJ"
{
"or": [
"canWallJump",
"HiJump"
]
}Clears obstacles: A Dev note: This will kill the Beetom, which could prevent using it to get up, so this needs to get all the way to 2. Anything with Morph can exit G-Mode at 6. |
From: 3
Bottom Left Door
To: 6
Junction (Above Bottom Rippers)


Requires switching between single and double IBJs. While Doubles are not techincally necessary, they make the strat more bearable. With a Power Bomb, it can help to kill some of the Rippers. Entrance condition: {
"comeInWithGMode": {
"mode": "any",
"morphed": true
}
}Requires: {
"notable": "IBJ Between the Bottom Rippers"
}
"h_artificialMorphDoubleBombJump"
"h_artificialMorphStaggeredIBJ"
"h_artificialMorphPowerBomb"
"h_artificialMorphLongIBJ" |
From: 4
Bottom Right Door
To: 2
Middle Left Door (Behind Power Bomb Blocks)
Requires switching between single and double IBJs. While Doubles are not techincally necessary, they make the strat more bearable. Exit G-Mode before the Power Bomb explodes in order to break the wall. With an extra Power Bomb, it may be worthwhile to use it to kill some of the Rippers. Entrance condition: {
"comeInWithGMode": {
"mode": "any",
"morphed": true
}
}Requires: {
"notable": "IBJ Between the Bottom Rippers"
}
"h_artificialMorphDoubleBombJump"
"h_artificialMorphStaggeredIBJ"
"h_artificialMorphPowerBomb"
"h_artificialMorphLongIBJ"
{
"or": [
"canWallJump",
"HiJump"
]
}Clears obstacles: A Dev note: This will kill the Beetom, which could prevent using it to get up, so this needs to get all the way to 2. Anything with Morph can exit G-Mode at 6. |
From: 4
Bottom Right Door
To: 6
Junction (Above Bottom Rippers)


Requires switching between single and double IBJs. While Doubles are not techincally necessary, they make the strat more bearable. With a Power Bomb, it can help to kill some of the Rippers. Entrance condition: {
"comeInWithGMode": {
"mode": "any",
"morphed": true
}
}Requires: {
"notable": "IBJ Between the Bottom Rippers"
}
"h_artificialMorphDoubleBombJump"
"h_artificialMorphStaggeredIBJ"
"h_artificialMorphPowerBomb"
"h_artificialMorphLongIBJ" |
From: 7
Junction (Bottom of Room)
To: 6
Junction (Above Bottom Rippers)
Requires switching between single and double IBJs. While Doubles are not techincally necessary, they make the strat more bearable. Requires: {
"notable": "IBJ Between the Bottom Rippers"
}
"canDoubleBombJump"
"canStaggeredIBJ"
"canLongIBJ" |