Etecoon Energy Tank Room: Beetom Clip (Hard)
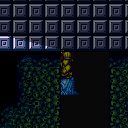
Jump and freeze the Beetom at a precise location in order to jump through the crumble blocks. The pixel window is larger and higher with Morph and an X-Ray Stand Up. Two Beetom hits are assumed, but with failed attempts it could take more, possibly requiring leaving the Beetom and going back to the right to farm.
Strats ()
|


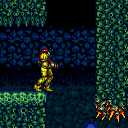
Jump and freeze the Beetom at a precise location in order to jump through the crumble blocks. The pixel window is larger and higher with Morph and an X-Ray Stand Up. Two Beetom hits are assumed, but with failed attempts it could take more, possibly requiring leaving the Beetom and going back to the right to farm. Requires: {
"notable": "Beetom Clip"
}
{
"noBlueSuit": {}
}
{
"or": [
"h_XRayMorphIceClip",
"h_preciseIceClip"
]
}
"Morph"
{
"enemyDamage": {
"enemy": "Beetom",
"type": "contact",
"hits": 2
}
}
{
"or": [
"h_preciseIceClip",
"canWallJump",
"HiJump",
"SpaceJump",
{
"enemyDamage": {
"enemy": "Beetom",
"type": "contact",
"hits": 2
}
}
]
}
{
"or": [
"canCrumbleJump",
"canWallJump",
"HiJump",
"SpaceJump"
]
}Dev note: Morph is required to lure a Beetom. Morphless tunnel crawl should not be required. |
From: 3
Bottom Left Door
To: 2
Top Right Door

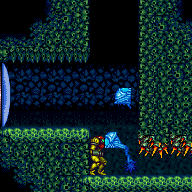
Bring two Beetoms through the morph tunnel, damage can be limited by carefully manipulating the Beetoms. Freeze both and allow one to unfreeze and refreeze it in position to clip. Allow the second Beetom to unfreeze and latch onto Samus. Perform the crumble block clip with the Beetom attached to bring it up to the top two doors. Requires: {
"obstaclesNotCleared": [
"A"
]
}
{
"notable": "Beetom Clip"
}
{
"noBlueSuit": {}
}
{
"or": [
"h_XRayMorphIceClip",
"h_preciseIceClip"
]
}
"Morph"
{
"enemyDamage": {
"enemy": "Beetom",
"type": "contact",
"hits": 3
}
}
{
"or": [
"h_preciseIceClip",
"canWallJump",
"HiJump",
"SpaceJump",
{
"enemyDamage": {
"enemy": "Beetom",
"type": "contact",
"hits": 2
}
}
]
}
{
"or": [
"canCrumbleJump",
"canWallJump",
"HiJump",
"SpaceJump"
]
}Clears obstacles: C Dev note: This strat is for bringing a Beetom above the crumble blocks in order to be used for a Moondance or G-Mode setup from either of the top two doors. |