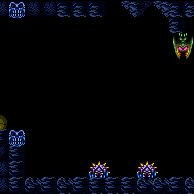
Blue Brinstar Energy Tank Room: G-Mode Flashing Lights (Expert+)
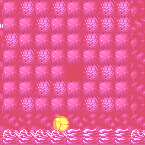
The eye scanners are particularly annoying while in G-mode. They scan Samus with bright flashing lights which remain for a further distance. This is notable so a player can disable having to enter these flashing lights. If disabled, Samus will only require being in G-mode in this room if Zebes is awake or if Samus does not have Morph.
Strats ()
From: 5
G-Mode Morph Junction (Bottom)
To: 2
Top Left Door
Overload PLMs by repeatidly bombing the Power Bomb blocks or the side of the crumble block, then enter through the crumble block. If Samus is then going to IBJ up the shaft, and she has Morph, it is worth exiting G-mode first to allow the camera to follow her. Requires: "canGMode"
"h_artificialMorphIBJ"
{
"or": [
"canConsecutiveWallJump",
"SpaceJump",
{
"and": [
"h_artificialMorphLongIBJ",
"canOffScreenMovement"
]
},
{
"and": [
{
"blueSuitShinecharge": {}
},
{
"or": [
{
"shinespark": {
"frames": 32,
"excessFrames": 3
}
},
{
"and": [
"HiJump",
{
"shinespark": {
"frames": 29,
"excessFrames": 3
}
}
]
}
]
}
]
}
]
}
{
"or": [
"h_ZebesIsAwake",
{
"notable": "G-Mode Flashing Lights"
}
]
}Dev note: The off screen movement is just during an artificial morphed IBJ - the IBJ is long and Samus is covered for most of it. |
From: 5
G-Mode Morph Junction (Bottom)
To: 2
Top Left Door


Overload PLMs by shooting the ceiling block item many times. Because the item is in a shot block, this does not require Direct G-mode, nor does it require the item to be uncollected. Requires: "canGMode"
"Morph"
{
"or": [
"canConsecutiveWallJump",
"SpaceJump"
]
}
{
"or": [
"h_ZebesIsAwake",
{
"notable": "G-Mode Flashing Lights"
}
]
} |
From: 5
G-Mode Morph Junction (Bottom)
To: 4
Right Item
Overload PLMs by shooting the ceiling block item many times. Because the item is in a shot block, this does not require Direct G-mode, nor does it require the item to be uncollected. After PLMs are overloaded, pass through the crumble block, exit G-mode, and break the crumble block. Requires: "canGMode"
"Morph"
{
"or": [
"h_ZebesIsAwake",
{
"notable": "G-Mode Flashing Lights"
}
]
}Clears obstacles: B |
From: 6
G-Mode Morph Junction Direct (Bottom)
To: 2
Top Left Door

Touch the item to overload PLMs then go through the crumble block and bomb block at the top of the shaft before exiting G-mode. Requires: "canGMode"
{
"itemNotCollectedAtNode": 4
}
"h_artificialMorphSpringBall"
{
"or": [
"canConsecutiveWallJump",
"SpaceJump",
{
"and": [
{
"blueSuitShinecharge": {}
},
{
"or": [
{
"shinespark": {
"frames": 32,
"excessFrames": 3
}
},
{
"and": [
"HiJump",
{
"shinespark": {
"frames": 29,
"excessFrames": 3
}
}
]
}
]
}
]
}
]
}
{
"or": [
"h_ZebesIsAwake",
{
"notable": "G-Mode Flashing Lights"
}
]
}Collects items: 4 Dev note: This will force Samus to pick up the item, so it can only be done once. itemNotCollectedAtNode implicitly includes canRiskPermanentLossOfAccess. Spring Ball is required, because Morph, Bombs, or a Power Bomb will allow other strats to be used instead. |