Lava Dive Room: HiJumpless Dive (Extreme)
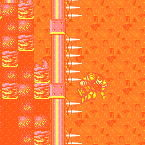

Use the bottommost right side namihe to generate a flame and walk with it to the bottommost left namihe head Use a turnaround animation as Samus is hit by the flame to cancel out knockback frames. While invulnerability frames are active, walljump up the spikes either 2 or 3 times and jump accross to catch the middle wall and climb from there.
Strats ()
|
Use the bottom-most right-side Namihe to generate a flame and walk with it to the bottom-most left Namihe head. Use a turnaround animation as Samus is hit by the flame to cancel out knockback frames. While invulnerability frames are active, walljump up the spikes either 2 or 3 times and jump accross to catch the middle wall and climb from there. Requires: {"notable": "HiJumpless Dive"},
{"noBlueSuit": {}},
"canSuitlessLavaDive",
"canUseIFrames",
"canTrickyWallJump",
"canFastWallJumpClimb",
"canUseEnemies",
"canCameraManip",
{"heatFrames": 600},
{"gravitylessLavaFrames": 500},
{"enemyDamage": {"enemy": "Namihe", "type": "fireball", "hits": 1}} |
From: 5
Lava, Center Namihe
To: 3
Above Lava Junction
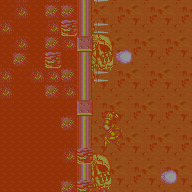

Use the bottom-most right-side Namihe to generate a flame and walk with it to the bottommost left Namihe head. Pause and use a turnaround animation as Samus is hit by the flame to cancel out knockback frames. Manually refill energy from reserves. While invulnerability frames are active, wall jump up the spikes either 2 or 3 times and jump accross to catch the middle wall and climb from there. Requires: {"notable": "HiJumpless Dive"},
{"noBlueSuit": {}},
"canSuitlessLavaDive",
"canUseIFrames",
"canTrickyWallJump",
"canFastWallJumpClimb",
"canUseEnemies",
"canCameraManip",
{"heatFrames": 175},
{"gravitylessLavaFrames": 175},
"h_pauseAbuseMinimalReserveRefill",
{"heatFrames": 375},
{"gravitylessLavaFrames": 300} |