Double Chamber: Shinespark through Wave Beam Door (Very Hard)
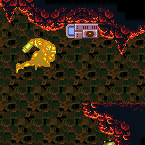
Charge a spark along the bottom of the room and use it to spark through the right side door. Requires opening the door and shutter first.
Strats ()
From: 3
Right Door
To: 3
Right Door
Charge a spark along the bottom of the room and use it to spark through the right side door. Requires opening the door and shutter first. Requires: {
"notable": "Shinespark through Wave Beam Door"
}
"HiJump"
"Morph"
{
"or": [
{
"obstaclesCleared": [
"A"
]
},
{
"heatFrames": 240
}
]
}
{
"or": [
{
"and": [
"canTrickyDashJump",
"canWalljump"
]
},
"SpaceJump"
]
}
{
"canShineCharge": {
"usedTiles": 28,
"gentleUpTiles": 3,
"gentleDownTiles": 3,
"openEnd": 0
}
}
{
"heatFrames": 780
}
{
"shinespark": {
"frames": 57
}
}Exit condition: {
"leaveWithSpark": {}
} |
From: 3
Right Door
To: 3
Right Door
Charge a spark along the bottom of the room and use it to spark through the right side door. Requires opening the door and shutter first. Requires: {
"notable": "Shinespark through Wave Beam Door"
}
"HiJump"
{
"or": [
"SpaceJump",
"Grapple"
]
}
{
"or": [
{
"obstaclesCleared": [
"A"
]
},
"Wave",
{
"and": [
"h_heatedBlueGateGlitch",
{
"heatFrames": 60
}
]
}
]
}
{
"or": [
{
"and": [
"canTrickyDashJump",
"canWalljump"
]
},
"SpaceJump"
]
}
{
"canShineCharge": {
"usedTiles": 28,
"gentleUpTiles": 3,
"gentleDownTiles": 3,
"openEnd": 0
}
}
{
"heatFrames": 780
}
{
"shinespark": {
"frames": 57
}
}Exit condition: {
"leaveWithSpark": {}
}Dev note: A hero shot variation of this strat might be possible, starting from a node to the left; if nothing else it could be done with a shortcharge on the 12-tile platform to the left. |