canEscapeEnemyGrab (Implicit)
The ability to become grabbed by Draygon or a Beetom and then escape by pressing 60+ inputs.
Strats ()
From: 9
Junction Below Items
To: 2
Middle Right Door


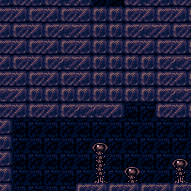
Bring a Beetom down from above and freeze it in position to extend the runway. Shoot it again then quickly go back up and grab the second Beetom. Keep a half-tile gap between the Beetoms and the runway in order to extend it as much as possible. This is possible without breaking the Power Bomb blocks, by having both Beetoms attach to Samus, roll through the crumble blocks, then shake off the Beetoms to separate them. Requires: {
"noBlueSuit": {}
}
"h_trickyFrozenEnemyRunway"
{
"enemyDamage": {
"enemy": "Beetom",
"type": "contact",
"hits": 9
}
}
{
"or": [
{
"obstaclesCleared": [
"A"
]
},
{
"and": [
"Morph",
"canEscapeEnemyGrab",
{
"enemyDamage": {
"enemy": "Beetom",
"type": "contact",
"hits": 3
}
}
]
}
]
}Exit condition: {
"leaveWithRunway": {
"length": 12,
"openEnd": 1
}
}Unlocks doors: {"types":["ammo"],"requires":[]} |
From: 9
Junction Below Items
To: 3
Bottom Left Door

It is possible to shake the Beetom off near the right door while facing left, then lure it down to the bottom without taking more hits (or to kill the Pirates with Bombs). Requires: {
"noBlueSuit": {}
}
{
"or": [
"Morph",
{
"obstaclesCleared": [
"A"
]
}
]
}
{
"or": [
{
"and": [
{
"enemyKill": {
"enemies": [
[
"Green Space Pirate (standing)",
"Green Space Pirate (standing)",
"Green Space Pirate (standing)"
],
[
"Green Space Pirate (standing)",
"Green Space Pirate (standing)"
]
]
}
},
{
"or": [
{
"enemyDamage": {
"enemy": "Beetom",
"type": "contact",
"hits": 8
}
},
{
"and": [
"canTrickyDodgeEnemies",
"canEscapeEnemyGrab",
{
"enemyDamage": {
"enemy": "Beetom",
"type": "contact",
"hits": 5
}
}
]
}
]
}
]
},
{
"and": [
{
"enemyDamage": {
"enemy": "Beetom",
"type": "contact",
"hits": 5
}
},
{
"enemyDamage": {
"enemy": "Green Space Pirate (standing)",
"type": "contact",
"hits": 3
}
}
]
}
]
}Exit condition: {
"leaveWithGModeSetup": {
"knockback": false
}
}Unlocks doors: {"types":["ammo"],"requires":[]}Dev note: FIXME: If starting the room at the bottom, the way it is written requires killing the pirates twice. If starting from the top of the room, it's going to take more hits and wiggling the Beetom off above if the only way to kill the pirates is with Power Bombs. |
From: 9
Junction Below Items
To: 4
Bottom Right Door
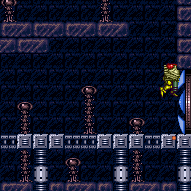
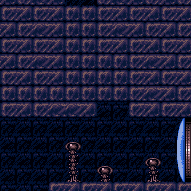
It is possible to shake the Beetom off near the right door while facing left, then lure it down to the bottom without taking more hits (or to kill the Pirates with Bombs). Requires: {
"noBlueSuit": {}
}
{
"or": [
"Morph",
{
"obstaclesCleared": [
"A"
]
}
]
}
{
"or": [
{
"and": [
{
"enemyKill": {
"enemies": [
[
"Green Space Pirate (standing)",
"Green Space Pirate (standing)",
"Green Space Pirate (standing)"
],
[
"Green Space Pirate (standing)",
"Green Space Pirate (standing)"
]
]
}
},
{
"or": [
{
"enemyDamage": {
"enemy": "Beetom",
"type": "contact",
"hits": 8
}
},
{
"and": [
"canTrickyDodgeEnemies",
"canEscapeEnemyGrab",
{
"enemyDamage": {
"enemy": "Beetom",
"type": "contact",
"hits": 5
}
}
]
}
]
}
]
},
{
"and": [
{
"enemyDamage": {
"enemy": "Beetom",
"type": "contact",
"hits": 5
}
},
{
"enemyDamage": {
"enemy": "Green Space Pirate (standing)",
"type": "contact",
"hits": 3
}
}
]
}
]
}Exit condition: {
"leaveWithGModeSetup": {
"knockback": false
}
}Unlocks doors: {"types":["ammo"],"requires":[]}Dev note: FIXME: If starting the room at the bottom, the way it is written requires killing the pirates twice. If starting from the top of the room, it's going to take more hits and wiggling the Beetom off above if the only way to kill the pirates is with Power Bombs. |
|


Use Speed Booster break all of the blocks and farm all but one Beetom. Carefully use the last Beetom to damage down, and then use it to interrupt. Entrance condition: {
"comeInWithRMode": {}
}Requires: {
"or": [
"h_CrystalFlashForReserveEnergy",
{
"and": [
"h_RModeCanRefillReserves",
{
"resourceMissingAtMost": [
{
"type": "PowerBomb",
"count": 0
}
]
},
{
"partialRefill": {
"type": "ReserveEnergy",
"limit": 30
}
}
]
}
]
}
"canStopOnADime"
"canEscapeEnemyGrab"
"h_shinechargeMaxRunway"
{
"autoReserveTrigger": {
"maxReserveEnergy": 63
}
}
"canRModeSparkInterrupt" |
|
Requires: "Ice"
{
"enemyKill": {
"enemies": [
[
"Metroid",
"Metroid",
"Metroid"
]
],
"explicitWeapons": [
"Super",
"Missile"
]
}
}
{
"or": [
"canPrepareForNextRoom",
{
"resetRoom": {
"nodes": [
2
]
}
},
{
"and": [
"h_useMorphBombs",
"canDodgeWhileShooting",
"canEscapeEnemyGrab",
{
"metroidFrames": 120
}
]
}
]
}
{
"or": [
"canTrickyJump",
{
"enemyDamage": {
"enemy": "Rinka",
"type": "contact",
"hits": 1
}
}
]
}Clears obstacles: f_KilledMetroidRoom4 Sets flags: f_KilledMetroidRoom4 |