The Moat: First-Try CWJ (Expert)
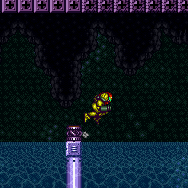
Perform a CWJ across the Moat on the first try, where failure may result in a softlock. Run towards the water and jump on the last possible frame. Perform the CWJ off of the item pedestal to cross to the other side.
Strats ()
|
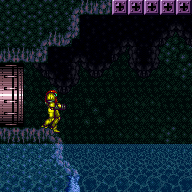
Stand on the farthest pixel into the door possible using moonwalk, X-Ray, or morphball turn around. Run towards the water and jump on the last possible frame. Perform the CWJ off of the item pedestal to cross to the other side. This requires running and jumping on the last possible frame before Samus would run off into the water. There is either a 1-frame or 2-frame window for the wall jump, depending on Samus' X subpixel position. To get a 2-frame window, Samus must start in the leftmost 75% of the pixel next to the transition. One method to guarantee that Samus gets a good subpixel is to jump and press against the overhang to align with it, then land, turn around, and moonwalk back into position. Requires: {
"or": [
{
"notable": "First-Try CWJ"
},
{
"and": [
"h_bombThings",
"h_additionalBomb",
"h_additionalBomb"
]
}
]
}
"canCWJ"
{
"disableEquipment": "HiJump"
}
{
"disableEquipment": "SpeedBooster"
}
{
"doorUnlockedAtNode": 1
}
"h_backIntoCorner"Collects items: 3 |
|
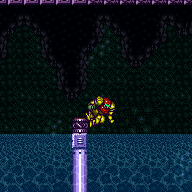
Align against the closed door shell on the other side of the transition. Run towards the water and jump on the last possible frame. Perform the CWJ off of the item pedestal to cross to the other side. This requires running and jumping on the last possible frame before Samus would run off into the water. If the setup is done correctly, there will then be a 2-frame window for the wall jump. Entrance condition: {
"comeInRunning": {
"speedBooster": "no",
"minTiles": 1.4
}
}Requires: {
"or": [
{
"notable": "First-Try CWJ"
},
{
"and": [
"h_bombThings",
"h_additionalBomb",
"h_additionalBomb"
]
}
]
}
"canCWJ"
{
"disableEquipment": "HiJump"
}
{
"disableEquipment": "SpeedBooster"
}Collects items: 3 |