West Ocean: Get Inside the Bridge (Extreme)
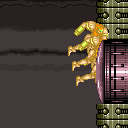
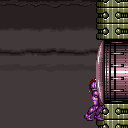
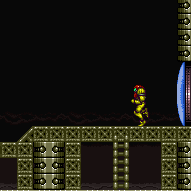
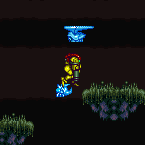
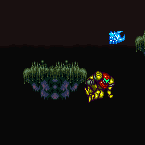
Enter the bridge using a deep-stuck X-ray climb from below or high fall speed from above. The doors do not connect to the same locations as Homing Geemer Room. They connect to the same locations as the bottom-left and bottom-right doors of the room. This can be used to bypass a lock on those doors or to exit with a longer runway.
Strats ()
From: 3
Upper Right Section - Bottom Right Door
To: 8
Bridge Right Door (Leads to Bottom Right Door)
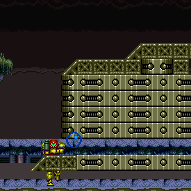
Moonfall onto the Homing Geemer walkway twice to clip down into the bridge below. The Moonfall must be performed at the very edge of the slope so that Samus fully falls to the lower area. The first Moonfall will clip into the slope above the walkway, and the second Moonfall will clip all the way through. Pose changing will allow Samus to remain inside of the bridge, where the right door connects to the WS main entrance door, and the left door connects to the Moat door. Entrance condition: {
"comeInWithStoredFallSpeed": {
"fallSpeedInTiles": 2
}
}Requires: {
"notable": "Get Inside the Bridge"
}
"canFreeFallClip"
"canSkipDoorLock" |
From: 4
Lower Section - Top Right Door
To: 8
Bridge Right Door (Leads to Bottom Right Door)
Climb up 1 screen. Entrance condition: {
"comeInWithGMode": {
"mode": "direct",
"morphed": false
}
}Requires: "canComplexGMode"
"canGModeXRayClimb"
{
"notable": "Get Inside the Bridge"
}
"canSkipDoorLock"
{
"or": [
"canArtificialMorph",
"canWallJump",
"SpaceJump",
{
"and": [
"canLongIBJ",
"Gravity"
]
},
{
"and": [
"HiJump",
"canJumpIntoIBJ"
]
},
{
"and": [
"canLongIBJ",
"canBombHorizontally",
"canResetFallSpeed"
]
},
{
"and": [
"canJumpIntoIBJ",
"canLongIBJ",
"canTrickyJump"
]
},
{
"and": [
"HiJump",
{
"or": [
"canSpeedyJump",
"canSpringBallJumpMidAir"
]
}
]
},
{
"and": [
"canTrickyJump",
"canPreciseGrapple"
]
},
{
"and": [
"Gravity",
"canMidairShinespark",
"h_shinechargeMaxRunway",
{
"shinespark": {
"frames": 35,
"excessFrames": 10
}
}
]
}
]
}
"canXRayClimb" |
From: 4
Lower Section - Top Right Door
To: 8
Bridge Right Door (Leads to Bottom Right Door)
Entrance condition: {
"comeInShinecharged": {}
}Requires: {
"shineChargeFrames": 1
}
{
"notable": "Get Inside the Bridge"
}
"canSkipDoorLock"
{
"shinespark": {
"frames": 1,
"excessFrames": 1
}
}
"canShinesparkDeepStuck"
"canXRayClimb" |
From: 4
Lower Section - Top Right Door
To: 8
Bridge Right Door (Leads to Bottom Right Door)
Enter with G-mode direct, back up to between 1 and 6 pixels from the door transition, and activate X-ray to get very deep stuck in the door. Climb up 1 screen, and perform a turnaround buffered spin-jump away from the door to trigger the transition, bypassing any lock on the door. Entrance condition: {
"comeInWithGMode": {
"mode": "direct",
"morphed": false
}
}Requires: "canComplexGMode"
"canGModeXRayClimb"
{
"notable": "Get Inside the Bridge"
}
{
"or": [
"canArtificialMorph",
"canWallJump",
"SpaceJump",
{
"and": [
"canLongIBJ",
"Gravity"
]
},
{
"and": [
"HiJump",
"canJumpIntoIBJ"
]
},
{
"and": [
"canLongIBJ",
"canBombHorizontally",
"canResetFallSpeed"
]
},
{
"and": [
"canJumpIntoIBJ",
"canLongIBJ",
"canTrickyJump"
]
},
{
"and": [
"HiJump",
{
"or": [
"canSpeedyJump",
"canSpringBallJumpMidAir"
]
}
]
},
{
"and": [
"canTrickyJump",
"canPreciseGrapple"
]
},
{
"and": [
"Gravity",
"canMidairShinespark",
"h_shinechargeMaxRunway",
{
"shinespark": {
"frames": 35,
"excessFrames": 10
}
}
]
}
]
}
"canXRayClimb"Bypasses door shell: true |
From: 12
Top Junction
To: 8
Bridge Right Door (Leads to Bottom Right Door)
Watch the middle Tripper move until it reaches the rightmost platform and then move it off camera. Move to the Zeb Spawner and freeze the bug as it is rising and facing right. Travel through the Morph tunnel and wait above the Zeb. Once it rises to the correct height, let it start moving right. Freeze the Zeb and the Tripper above the Bridge and perform the Enemy Stuck Moonfall. Move off after building enough fall speed and wiggle back and forth to clip through the Bridge and land inside. Requires: {
"notable": "Get Inside the Bridge"
}
"canSkipDoorLock"
"canEnemyStuckMoonfall"
"canFreeFallClip"
"canTrickyUseFrozenEnemies"
{
"or": [
"h_useSpringBall",
{
"and": [
"h_bombThings",
"h_additionalBomb"
]
}
]
}Dev note: FIXME: A [6, 8] version of this strat is possible with slightly different requirements but is more difficult. |
