West Ocean: G-mode Overload PLMs by Power Bombing Morph Maze Item (Extreme)
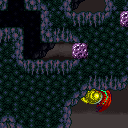
To overload the PLMs, place a PB precisely to the right of the bottom of the second overhang above the bottom left door. This is at the max jump height without HiJump. Placing the PB higher or lower will not overload the PLMs without many PBs.
Strats ()
From: 17
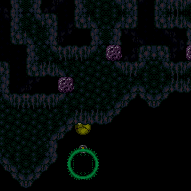
G-Mode Morph Junction Direct (By Left Door)
To: 1
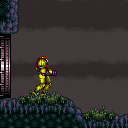
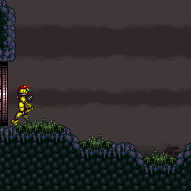
Lower Section - Bottom Left Door
To overload the PLMs, place a Power Bomb precisely to the right of the bottom of the second overhang above the bottom left door. This is at the max jump height without HiJump. Placing the Power Bomb higher or lower will not overload the PLMs without many Power Bombs. Requires: "canPowerBombItemOverloadPLMs"
"canComplexGMode"
{
"notable": "G-mode Overload PLMs by Power Bombing Morph Maze Item"
}
"h_usePowerBomb"
{
"or": [
"SpaceJump",
"canLongIBJ",
{
"and": [
"canTrickyDashJump",
"canTrickySpringBallJump",
"HiJump"
]
}
]
}Collects items: 10 Dev note: This requires the item to not be collected, but there is no reason to do this without it being there, so there is no canRiskPermanentLossOfAccess. |
From: 17
G-Mode Morph Junction Direct (By Left Door)
To: 16
G-Mode Morph Overloaded PLMs (By Left Door)
To overload the PLMs, place a Power Bomb precisely to the right of the bottom of the second overhang above the bottom left door. This is at the max jump height without HiJump. Placing the Power Bomb higher or lower will not overload the PLMs without many Power Bombs. Requires: "canPowerBombItemOverloadPLMs"
"canComplexGMode"
{
"notable": "G-mode Overload PLMs by Power Bombing Morph Maze Item"
}
{
"itemNotCollectedAtNode": 10
}
"canRiskPermanentLossOfAccess"
{
"or": [
"h_artificialMorphLongIBJ",
"Morph",
{
"and": [
"h_artificialMorphSpringBall",
{
"or": [
"HiJump",
"h_artificialMorphBombThings"
]
}
]
}
]
}
"h_artificialMorphPowerBomb" |