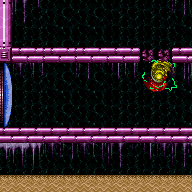
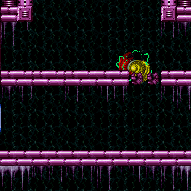
Oasis: Cross Room Jump with Screw Attack (Expert)
Use Screw Attack to break the bomb block by entering from a non-water room with a spin jump. It helps to enter as low as possible and with as much horizontal speed as possible and with HiJump turned off. Depending on the setup, this may have collision oscillation, making only a 50% success when done correctly.
Strats ()
|
Use Screw Attack to break the bomb block by entering from a non-water room with a spin jump. It helps to enter as low as possible and with as much horizontal speed as possible and with HiJump turned off. Even if executed correctly, the trick can fail with 50% probability due to collision oscillation. Entrance condition: {
"comeInJumping": {
"speedBooster": "any",
"minTiles": 4.4375
}
}Requires: {
"notable": "Cross Room Jump with Screw Attack"
}
"canTrickyJump"
"canCrossRoomJumpIntoWater"
"ScrewAttack"Clears obstacles: A |
From: 1
Left Door
To: 1
Left Door
Use Screw Attack to break the bomb block by entering from a non-water room with a spin jump. It helps to enter as low as possible and with as much horizontal speed as possible and with HiJump turned off. Even if executed correctly, the trick can fail with 50% probability due to collision oscillation. Entrance condition: {
"comeInJumping": {
"speedBooster": "yes",
"minTiles": 3
}
}Requires: {
"notable": "Cross Room Jump with Screw Attack"
}
"canTrickyJump"
"canCrossRoomJumpIntoWater"
"ScrewAttack"Clears obstacles: A |
|

Use Screw Attack to break the bomb block by entering from a non-water room with a spin jump. It generally helps to enter as low as possible and with as much horizontal speed as possible, and with HiJump turned off except if jumping from a very low platform. Even if executed correctly, in most cases the trick can fail with 50% probability due to collision oscillation. Entrance condition: {
"comeInWithSidePlatform": {
"platforms": [
{
"minHeight": 1,
"maxHeight": 2,
"minTiles": 13.4375,
"speedBooster": "yes",
"obstructions": [
[
1,
0
]
],
"requires": [
"canTrickyDashJump"
],
"note": [
"Applies to Warehouse Entrance and Dust Torizo Room.",
"Gain extra run speed between $3.2 and $3.5, at a position where Samus just barely clears the obstruction."
],
"devNote": [
"It is technically also possible from Ridley Tank Room, using exact run speed $1.8 and subpixels in a narrow range.",
"But without a normalized setup it doesn't seem reasonable."
]
},
{
"minHeight": 3,
"maxHeight": 3,
"minTiles": 8.4375,
"speedBooster": "any",
"obstructions": [
[
1,
0
],
[
3,
2
]
],
"note": [
"Applies to Big Boy Room, Mickey Mouse Room, and Metal Pirates."
]
},
{
"minHeight": 6,
"maxHeight": 6,
"minTiles": 2.5625,
"speedBooster": "yes",
"obstructions": [
[
5,
6
]
],
"requires": [
"canTrickyDashJump"
],
"note": [
"Applies to Fast Pillars Setup Room.",
"Gain extra run speed exactly $1.1."
]
},
{
"minHeight": 8,
"maxHeight": 8,
"minTiles": 6,
"speedBooster": "no",
"obstructions": [
[
1,
0
]
],
"requires": [
"HiJump"
],
"note": [
"Applies to Screw Attack Room.",
"With extra run speed exactly $1.E, it works without collision oscillation.",
"Extra run speed $1.D also works, but with collision oscillation giving a 50% failure rate, as with most other setups."
]
}
]
}
}Requires: {
"notable": "Cross Room Jump with Screw Attack"
}
"ScrewAttack"
"canCrossRoomJumpIntoWater"
"canTrickyJump"Clears obstacles: A |
From: 1
Left Door
To: 9
Center Platforms

Use Screw Attack to break the bomb block by entering from a non-water room with a spin jump, and make it up to the center of the room. It helps to enter as low as possible and with as much horizontal speed as possible and with HiJump turned off. Enter with extra run speed between $3.2 and $3.F, with the lower speeds in this range being better. Entrance condition: {
"comeInJumping": {
"speedBooster": "yes",
"minTiles": 12.4375
}
}Requires: {
"notable": "Cross Room Jump with Screw Attack"
}
"canInsaneJump"
"canCrossRoomJumpIntoWater"
"ScrewAttack"
"canMomentumConservingTurnaround"Dev note: This does not have collision oscillation. |
|
Use Screw Attack to break the bomb block by entering from a non-water room with a spin jump. It helps to enter as low as possible and with as much horizontal speed as possible and with HiJump turned off. Even if executed correctly, the trick can fail with 50% probability due to collision oscillation. Entrance condition: {
"comeInJumping": {
"speedBooster": "any",
"minTiles": 4.4375
}
}Requires: {
"notable": "Cross Room Jump with Screw Attack"
}
"canTrickyJump"
"canCrossRoomJumpIntoWater"
"ScrewAttack"Clears obstacles: A |
From: 2
Right Door
To: 2
Right Door
Use Screw Attack to break the bomb block by entering from a non-water room with a spin jump. It helps to enter as low as possible and with as much horizontal speed as possible and with HiJump turned off. Even if executed correctly, the trick can fail with 50% probability due to collision oscillation. Entrance condition: {
"comeInJumping": {
"speedBooster": "yes",
"minTiles": 3
}
}Requires: {
"notable": "Cross Room Jump with Screw Attack"
}
"canTrickyJump"
"canCrossRoomJumpIntoWater"
"ScrewAttack"Clears obstacles: A |
|
Use blue speed to break the bomb block by entering from a non-water room with a spin jump. It generally helps to enter as low as possible and with as much horizontal speed as possible, and with HiJump turned off. Even if executed correctly, the trick can fail with 50% probability due to collision oscillation. Shinesparking is typically an easier alternative to this strat; but using blue speed can be useful to save some energy or if carrying a flash suit. Entrance condition: {
"comeInWithSidePlatform": {
"platforms": [
{
"minHeight": 1,
"maxHeight": 1,
"minTiles": 16,
"speedBooster": "yes",
"obstructions": [
[
1,
0
]
],
"requires": [
{
"getBlueSpeed": {
"usedTiles": 15,
"openEnd": 0
}
},
"h_blueJump",
"canMomentumConservingMorph"
],
"note": [
"Applies to Lava Dive Room."
]
},
{
"minHeight": 2,
"maxHeight": 2,
"minTiles": 27.4375,
"speedBooster": "yes",
"obstructions": [
[
1,
0
]
],
"requires": [
{
"getBlueSpeed": {
"usedTiles": 24,
"openEnd": 1
}
},
"h_blueJump"
],
"note": [
"Applies to Dust Torizo Room and Noob Bridge."
]
},
{
"minHeight": 3,
"maxHeight": 3,
"minTiles": 28.2472,
"speedBooster": "yes",
"obstructions": [
[
1,
0
]
],
"requires": [
{
"getBlueSpeed": {
"usedTiles": 24,
"openEnd": 1
}
},
"h_blueJump"
],
"note": [
"Applies to Double Chamber."
]
},
{
"minHeight": 1,
"maxHeight": 1,
"minTiles": 36.3703,
"speedBooster": "yes",
"obstructions": [
[
3,
0
]
],
"environment": "water",
"requires": [
"h_getBlueSpeedMaxRunway",
"h_blueJump",
"canGravityJump",
"canMomentumConservingMorph"
],
"note": [
"This applies to Botwoon Energy Tank Room"
],
"detailNote": [
"Use a 1-tap to gain blue speed, and time a pause to hit just after jumping and aiming down,",
"then unequip Gravity and hold down during the unpause black screen to buffer the morph."
]
},
{
"minHeight": 2,
"maxHeight": 2,
"minTiles": 45,
"speedBooster": "yes",
"obstructions": [
[
3,
0
]
],
"requires": [
"h_getBlueSpeedMaxRunway",
"h_blueJump",
"canInsaneJump",
"canMomentumConservingMorph"
],
"note": [
"This applies to Statues Hallway and Baby Kraid Room"
],
"detailNote": [
"Use a 1-tap to gain blue speed, and time a pause to hit just after jumping and aiming down,",
"then unequip Gravity and hold down during the unpause black screen to buffer the morph."
]
},
{
"minHeight": 3,
"maxHeight": 3,
"minTiles": 21.4375,
"speedBooster": "yes",
"obstructions": [
[
3,
0
]
],
"environment": "water",
"requires": [
{
"getBlueSpeed": {
"usedTiles": 18,
"openEnd": 1
}
},
"h_blueJump",
"canInsaneJump",
"canGravityJump",
"canMomentumConservingMorph"
],
"note": [
"This applies to Draygon's Room"
],
"detailNote": [
"Use a 2-tap to gain blue speed, and time a pause to hit just after jumping and aiming down,",
"then unequip Gravity and hold down during the unpause black screen to buffer the morph."
]
},
{
"minHeight": 3,
"maxHeight": 3,
"minTiles": 30.4375,
"speedBooster": "yes",
"obstructions": [
[
3,
0
]
],
"requires": [
{
"getBlueSpeed": {
"usedTiles": 27,
"openEnd": 1
}
},
"h_blueJump",
"canMomentumConservingMorph",
"canInsaneJump"
],
"note": [
"This applies to Blue Brinstar Energy Tank Room, Bowling Alley (middle), and Basement (power on)"
]
},
{
"minHeight": 3,
"maxHeight": 3,
"minTiles": 39.4375,
"speedBooster": "yes",
"obstructions": [
[
3,
2
]
],
"requires": [
"h_getBlueSpeedMaxRunway",
"h_blueJump",
{
"or": [
"canMomentumConservingMorph",
"canInsaneJump"
]
}
],
"note": [
"Applies to Metal Pirates Room."
]
},
{
"minHeight": 3,
"maxHeight": 3,
"minTiles": 37.4375,
"speedBooster": "yes",
"obstructions": [
[
5,
2
]
],
"requires": [
"h_getBlueSpeedMaxRunway",
"h_blueJump",
"canInsaneJump",
"canMomentumConservingMorph"
],
"note": [
"Applies to Flyway."
]
}
]
}
}Requires: {
"notable": "Cross Room Jump with Screw Attack"
}
"canCrossRoomJumpIntoWater"
"canTrickyJump"Clears obstacles: A Dev note: The momentum-conserving morph variants are included for completeness, though generally if Morph is available it would be easier to speedball and do a temporary blue chain. FIXME: some of these setups can make it above the bomb blocks, so they could have a variant going to node 6. |
|
Use Screw Attack to break the bomb block by entering from a non-water room with a spin jump. It generally helps to enter as low as possible and with as much horizontal speed as possible, and with HiJump turned off. Even if executed correctly, the trick can fail with 50% probability due to collision oscillation. Entrance condition: {
"comeInWithSidePlatform": {
"platforms": [
{
"minHeight": 1,
"maxHeight": 1,
"minTiles": 13.4375,
"speedBooster": "yes",
"obstructions": [
[
1,
0
]
],
"requires": [
"canTrickyDashJump"
],
"note": [
"Applies to Lava Dive.",
"Gain extra run speed of $3.5, at a position where Samus just barely clears the obstruction:",
"Starting at a horizontal position of $110 (272) or $111 (273) works at any subpixels;",
"parts of the neighboring pixels on either side also work."
],
"devNote": [
"Run speed $3.2 works, at a pixel position of $F7 (247) with any subpixel, or on parts of the neighboring pixel on either side;",
"run speed $3.8 is possible but does not have an entire pixel that works."
]
},
{
"minHeight": 2,
"maxHeight": 2,
"minTiles": 5.4375,
"speedBooster": "yes",
"obstructions": [
[
1,
0
]
],
"note": [
"Applies to Early Super Room, Bowling Alley (Bottom), Tourian Hopper Room, Dust Torizo Room, and Noob Bridge."
]
},
{
"minHeight": 2,
"maxHeight": 2,
"minTiles": 8.4375,
"speedBooster": "any",
"obstructions": [
[
1,
0
]
],
"requires": [
"canInsaneJump"
],
"note": [
"Applies to Bowling Alley (Bottom), Tourian Hopper Room, Dust Torizo Room, and Noob Bridge.",
"Without Speed Booster, this requires specific positioning to align Samus to just barely clear the door ledge."
]
},
{
"minHeight": 3,
"maxHeight": 3,
"minTiles": 8.4375,
"speedBooster": "any",
"obstructions": [
[
1,
0
]
],
"note": [
"Applies to Bomb Torizo Room, Pink Brinstar Wave Gate Room, Phantoon's Room, Big Boy Room, Double Chamber."
]
},
{
"minHeight": 3,
"maxHeight": 3,
"minTiles": 5,
"speedBooster": "yes",
"obstructions": [
[
1,
0
],
[
3,
2
]
],
"note": [
"Applies to Bomb Torizo Room, Pink Brinstar Wave Gate Room, Phantoon's Room, Big Boy Room, Double Chamber, and Metal Pirates Room.",
"With extra run speed exactly $1.2, this works without collision oscillation.",
"Extra run speed up through $1.8 also work but with collision oscillation giving a 50% failure rate, as with most other setups."
]
},
{
"minHeight": 4,
"maxHeight": 4,
"minTiles": 4.5625,
"speedBooster": "yes",
"obstructions": [
[
5,
4
]
],
"note": [
"Applies to Tourian Escape Room 4."
]
}
]
}
}Requires: {
"notable": "Cross Room Jump with Screw Attack"
}
"ScrewAttack"
"canCrossRoomJumpIntoWater"
"canTrickyJump"Clears obstacles: A |
From: 2
Right Door
To: 9
Center Platforms
Use Screw Attack to break the bomb block by entering from a non-water room with a spin jump, and make it up to the center of the room. It helps to enter as low as possible and with as much horizontal speed as possible and with HiJump turned off. Enter with extra run speed between $3.2 and $3.F, with the lower speeds in this range being better. Entrance condition: {
"comeInJumping": {
"speedBooster": "yes",
"minTiles": 12.4375
}
}Requires: {
"notable": "Cross Room Jump with Screw Attack"
}
"canInsaneJump"
"canCrossRoomJumpIntoWater"
"ScrewAttack"
"canMomentumConservingTurnaround"Dev note: This does not have collision oscillation. |