Plasma Spark Room: Left Shaft Precise Crouch Jump Down Grab (Expert)
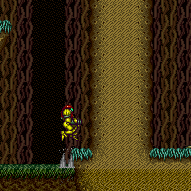
Starting from the edge of the platforms that stick out, crouch jump and down grab to get to the next one. Going up from the left runway does not work, as that starts one tile further to the left.
Strats ()
|
Entrance condition: {
"comeInWithGMode": {
"mode": "any",
"morphed": true
},
"comesThroughToilet": "any"
}Requires: {
"or": [
{
"and": [
"h_artificialMorphIBJ",
"h_artificialMorphBombHorizontally"
]
},
{
"and": [
"h_artificialMorphLongIBJ",
"Gravity"
]
},
{
"and": [
"h_artificialMorphSpringBallBombJump",
"h_additionalBomb",
"h_additionalBomb",
"h_additionalBomb"
]
},
{
"and": [
"h_artificialMorphSpringBallBombJump",
{
"notable": "Left Shaft Precise Crouch Jump Down Grab"
}
]
}
]
} |
From: 2
Bottom Right Door
To: 1
Left Vertical Door
Gravity jump out of the water then perform a precise crouch jump + down grab to get onto the next ledge. Requires: {
"notable": "Left Shaft Precise Crouch Jump Down Grab"
}
"canGravityJump"
"h_crouchJumpDownGrab"
"canTrickyJump" |
From: 2
Bottom Right Door
To: 1
Left Vertical Door


Start the dash as close to the door transition as possible to help avoid getting hit by the first Owtch. Store the shine charge while high up on the left slope. Spark up while on the right side of the platform. To avoid the Owtch on the platform, it may help to jump on the left side of the platform then jump again and spark midair above the right side. Entrance condition: {
"comeInRunning": {
"speedBooster": "yes",
"minTiles": 0.4375
}
}Requires: "canWaterShineCharge"
"canShinechargeMovementComplex"
{
"or": [
{
"shinespark": {
"frames": 90,
"excessFrames": 50
}
},
{
"and": [
{
"shinespark": {
"frames": 90,
"excessFrames": 59
}
},
{
"or": [
"canWallJump",
"HiJump",
"canSpringBallJumpMidAir",
"SpaceJump",
{
"and": [
"canIBJ",
"canBombHorizontally"
]
},
{
"and": [
"h_crouchJumpDownGrab",
{
"notable": "Left Shaft Precise Crouch Jump Down Grab"
}
]
}
]
}
]
}
]
} |
|
With HiJump, jump left and spark up right while against the left wall to save Energy. With Ice, wait for the Skultera and use it save a small amount of Energy. With HiJump and Ice, crouch jump from the frozen fish while shooting to prevent activating the spark, then downgrab the ledge above. Requires: "h_storedSpark"
{
"or": [
{
"shinespark": {
"frames": 72,
"excessFrames": 49
}
},
{
"and": [
{
"shinespark": {
"frames": 72,
"excessFrames": 58
}
},
"h_crouchJumpDownGrab",
{
"notable": "Left Shaft Precise Crouch Jump Down Grab"
}
]
},
{
"and": [
"HiJump",
{
"shinespark": {
"frames": 24,
"excessFrames": 13
}
}
]
},
{
"and": [
"canGravityJump",
{
"shinespark": {
"frames": 13,
"excessFrames": 12
}
}
]
},
{
"and": [
"HiJump",
"canTrickyUseFrozenEnemies",
{
"shinespark": {
"frames": 14,
"excessFrames": 13
}
}
]
}
]
} |
|

Entrance condition: {
"comeInWithGMode": {
"mode": "any",
"morphed": true
}
}Requires: {
"or": [
"Gravity",
{
"and": [
"canSuitlessMaridia",
"HiJump",
"h_artificialMorphSpringBall"
]
}
]
}
{
  "or": [
    "h_artificialMorphLongIBJ",
    {
      "and": [
        "Gravity",
        "h_artificialMorphIBJ",
        "h_artificialMorphBombHorizontally"
      ]
    },
    {
      "and": [
        "canGravityJump",
        "h_artificialMorphSpringBallBombJump",
        {
          "or": [
            "h_additionalBomb",
            {
              "tech": "canDoubleSpringBallJumpMidAir"
            }
          ]
        },
        {
          "or": [
            {
              "and": [
                "h_additionalBomb",
                "h_additionalBomb"
              ]
            },
            {
              "notable": "Left Shaft Precise Crouch Jump Down Grab"
            }
          ]
        }
      ]
    }
  ]
} |
|

Entrance condition: {
"comeInWithGMode": {
"mode": "any",
"morphed": true
}
}Requires: {
"or": [
"h_artificialMorphLongIBJ",
{
"and": [
"Gravity",
"h_artificialMorphIBJ",
"h_artificialMorphBombHorizontally"
]
},
{
"and": [
"canGravityJump",
"h_artificialMorphSpringBallBombJump",
{
"or": [
"h_additionalBomb",
{
"tech": "canDoubleSpringBallJumpMidAir"
}
]
},
{
"or": [
{
"and": [
"h_additionalBomb",
"h_additionalBomb"
]
},
{
"notable": "Left Shaft Precise Crouch Jump Down Grab"
}
]
}
]
}
]
} |