Lower Norfair Spring Ball Maze: Crystal Flash Clip (Hard)
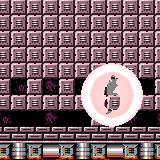
Perform the crystal flash all the way against the left wall of the accessible tunnel, then jump through the ceiling.
Strats ()
From: 2
Right Vertical Door
To: 5
Spring Ball Maze Junction (Past the Bomb Blocks)
Perform the Crystal Flash all the way against the left wall of the accessible tunnel, then jump through the ceiling. Requires: {
"notable": "Crystal Flash Clip"
}
{
"heatFrames": 100
}
"h_heatedCrystalFlash"
"canCeilingClip"
{
"or": [
"canTrivialMidAirMorph",
"h_useSpringBall"
]
}
{
"heatFrames": 175
}Clears obstacles: B Dev note: After the CF, a midair morph can be avoided with a single bomb, but midair morph is expected for this level. The heat frames are based on reaching the entrance of the last morph tunnel. FIXME: in the room diagram, draw node 5 using a smaller box to more precisely indicate this location. |
From: 2
Right Vertical Door
To: 7
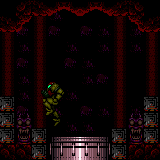
Junction By Lower Alcoons (Left of Spike Pits)
Crystal Flash against the left edge of the tunnel, then jump through the ceiling. You cannot use Power Bombs or X-Ray after the Crystal Flash clip. Kill the Alcoon to clear the runway then drop into the lower left Alcoon to interrupt. Entrance condition: {
"comeInWithRMode": {},
"comesThroughToilet": "no"
}Requires: {
"notable": "Crystal Flash Clip"
}
{
"heatFrames": 100
}
"h_heatedCrystalFlashForReserveEnergy"
"canCeilingClip"
"canTrivialMidAirMorph"
{
"heatFrames": 240
}
{
"or": [
{
"enemyKill": {
"enemies": [
[
"Alcoon"
]
],
"explicitWeapons": [
"Missile",
"Super",
"Charge+Plasma",
"Wave+Plasma"
]
}
},
{
"heatFrames": 200
}
]
}
{
"canShineCharge": {
"usedTiles": 27,
"gentleUpTiles": 2,
"openEnd": 0
}
}
{
"or": [
"canDownBack",
"canTrickyJump"
]
}
{
"heatFrames": 120
}
{
"autoReserveTrigger": {
"maxReserveEnergy": 95
}
}
"canRModeSparkInterrupt"Clears obstacles: A, B |