The Worst Room In The Game: HiJump and Only Screw (Extreme)
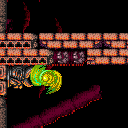
Break the bomb blocks in The Worst Room In The Game with extremely precise walljumps. Either with a fully delayed max height jump from the wall, or with an instant turnaround after jumping from the lower layer of bomb blocks.
Strats ()
From: 2
Bottom Left Door
To: 1
Top Left Door
With Screw Attack, break the bomb blocks with either a fully delayed max height jump from the wall, or with an instant turnaround after jumping from the lower layer of bomb blocks. Hit the shot blocks at the top of the room with a Power Bomb or Wave before exiting G-mode to save some heat damage. Entrance condition: {
"comeInWithGMode": {
"mode": "any",
"morphed": false
}
}Requires: "h_heatedGMode"
{
"or": [
{
"and": [
{
"notable": "HiJump and Only Screw"
},
"ScrewAttack",
"HiJump",
"canMidairWiggle"
]
},
{
"haveBlueSuit": {}
}
]
}
"canInsaneWallJump"
"canInsaneJump"
{
"or": [
"Wave",
"h_usePowerBomb",
{
"heatFrames": 40
}
]
}
{
"heatFrames": 120
}Clears obstacles: A |
From: 2
Bottom Left Door
To: 3
Top Right Door

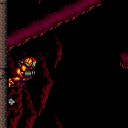
Break the bomb blocks with either a fully delayed max height jump from the wall, or with an instant turnaround after jumping from the lower layer of bomb blocks. It is possible to kill the pirate at the top of the room and use a pause abuse on G-mode exit to collect its drops. This requires getting somewhat lucky, as there is approximately a 70% chance that the pirate will give a large energy drop (small is not enough). To do this requires not climbing the room too quickly - one or two failed attempts at breaking the bomb blocks should be plenty, then exit G-mode, pause abuse, and kill the pirate before the pause triggers with a precisely timed spin jump into it. Entrance condition: {
"comeInWithGMode": {
"mode": "any",
"morphed": false
}
}Requires: {
"or": [
{
"and": [
{
"notable": "HiJump and Only Screw"
},
"ScrewAttack",
"HiJump",
"canMidairWiggle"
]
},
{
"haveBlueSuit": {}
}
]
}
"canInsaneWallJump"
"canInsaneJump"
{
"or": [
"h_heatedGModeOpenDifferentDoor",
{
"and": [
"h_heatedGModePauseAbuse",
"canTrickyGMode"
]
}
]
}Clears obstacles: A |
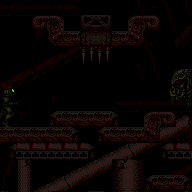
From: 6
Bottom Platform Junction With Pirates Killed
To: 4
Junction Above Bomb Blocks
Break the bomb blocks with extremely precise walljumps. Either with a fully delayed max height jump from the wall, or with an instant turnaround after jumping from the lower layer of bomb blocks. Requires: {
"notable": "HiJump and Only Screw"
}
"h_heatProof"
"HiJump"
"ScrewAttack"
"canInsaneWallJump"
"canInsaneJump"
"canConsecutiveWallJump"
"canMidairWiggle"Clears obstacles: A |