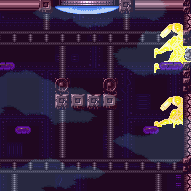
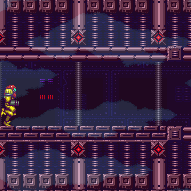
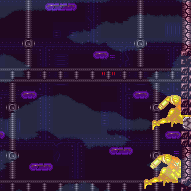
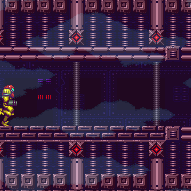
Climb: Behemoth Shinespark (Very Hard)
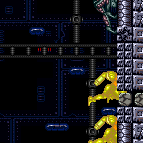
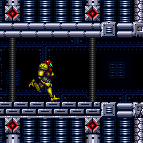
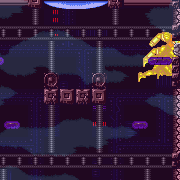
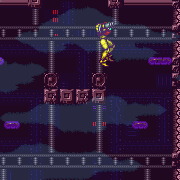
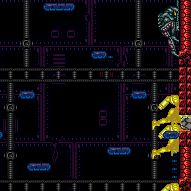
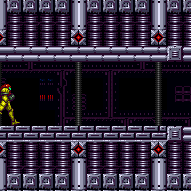
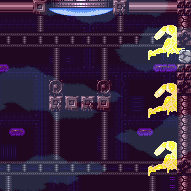
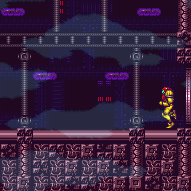
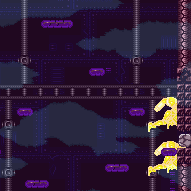
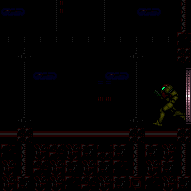
Diagonal shinespark up the climb to break the bomb blocks to the morph tunnels on the right. For the top block, spark from a crouch.
Strats ()
|
Diagonal shinespark up the climb to break the bomb blocks to the top right morph tunnel. A consistent place to spark from is the small platform below the bomb block, using a crouch jump and then a diagonal spark (not a crouched diagonal spark). Entrance condition: {
"comeInShinecharged": {},
"comesThroughToilet": "no"
}Requires: {
"shineChargeFrames": 55
}
{
"notable": "Behemoth Shinespark"
}
"canShinechargeMovementComplex"
{
"shinespark": {
"frames": 5
}
}
"Morph" |
From: 1
Top Door
To: 3
Top Right Door
Diagonal shinespark up the climb to break the bomb blocks to the top right morph tunnel. A consistent place to spark from is the small platform below the bomb block, using a crouch jump and then a diagonal spark (not a crouched diagonal spark). Entrance condition: {
"comeInShinecharged": {},
"comesThroughToilet": "yes"
}Requires: {
"shineChargeFrames": 65
}
{
"notable": "Behemoth Shinespark"
}
"canShinechargeMovementComplex"
{
"shinespark": {
"frames": 5
}
}
"Morph" |
From: 2
Bottom Left Door
To: 3
Top Right Door
Starting with a crouch, diagonal shinespark to the top to break the bomb blocks to the morph tunnels on the right. Entrance condition: {
"comeInShinecharging": {
"length": 14,
"openEnd": 0
}
}Requires: {
"notable": "Behemoth Shinespark"
}
"Morph"
{
"shinespark": {
"frames": 147
}
}Clears obstacles: A, B |
From: 2
Bottom Left Door
To: 4
Middle Right Door
Entrance condition: {
"comeInShinecharging": {
"length": 14,
"openEnd": 0
}
}Requires: {
"notable": "Behemoth Shinespark"
}
"Morph"
{
"shinespark": {
"frames": 147,
"excessFrames": 124
}
}
"h_ClimbWithoutLava"Clears obstacles: A, B |
From: 2
Bottom Left Door
To: 4
Middle Right Door
Entrance condition: {
"comeInShinecharging": {
"length": 14,
"openEnd": 0
}
}Requires: {
"notable": "Behemoth Shinespark"
}
"Morph"
{
"shinespark": {
"frames": 147,
"excessFrames": 124
}
}
{
"or": [
"h_lavaProof",
"canMoonfall",
{
"lavaFrames": 120
},
{
"and": [
"Gravity",
{
"lavaFrames": 100
}
]
}
]
}Exit condition: {
"leaveNormally": {}
}Unlocks doors: {"types":["super"],"requires":[]}
{"types":["missiles"],"requires":[{"lavaFrames":50}]}
{"types":["powerbomb"],"requires":[{"lavaFrames":110}]} |
From: 5
Bottom Right Door
To: 3
Top Right Door
Starting with a crouch, diagonal shinespark to the top to break the bomb blocks to the morph tunnels on the right. Entrance condition: {
"comeInShinecharging": {
"length": 12,
"openEnd": 0
}
}Requires: {
"notable": "Behemoth Shinespark"
}
"Morph"
{
"shinespark": {
"frames": 147
}
}Clears obstacles: A |
From: 5
Bottom Right Door
To: 4
Middle Right Door
Entrance condition: {
"comeInShinecharging": {
"length": 12,
"openEnd": 0
}
}Requires: {
"notable": "Behemoth Shinespark"
}
"Morph"
{
"shinespark": {
"frames": 147,
"excessFrames": 124
}
}Clears obstacles: A |
|
Starting with a crouch, diagonal shinespark to the top to break the bomb blocks to the morph tunnels on the right. Requires: {
"notable": "Behemoth Shinespark"
}
"Morph"
{
"canShineCharge": {
"usedTiles": 28,
"openEnd": 0
}
}
{
"shinespark": {
"frames": 147
}
}
{
"obstaclesCleared": [
"A"
]
}
{
"or": [
"h_ClimbWithoutLava",
{
"obstaclesNotCleared": [
"B"
]
}
]
} |
|
Diagonal shinespark to break the bomb blocks to the morph tunnel on the right. Spark from the highest platform that is only one tile from the right wall (the morph tunnel will be off camera, but can be seen while jumping). From this platform, the shinespark can be done with or without a crouch. Requires: {
"notable": "Behemoth Shinespark"
}
"Morph"
{
"useFlashSuit": {}
}
{
"shinespark": {
"frames": 18,
"excessFrames": 4
}
} |
|
Manipulate the Pirates to the right wall while climbing the room. Kill all the Pirates while moonfalling down the right side. Then quickly gain a shinecharge, crouch, and perform a diagonal shinespark to the top, collecting the drops along the way. Requires: {
"notable": "Behemoth Shinespark"
}
"h_ZebesIsAwake"
"canTrickyDodgeEnemies"
"canFarmWhileShooting"
"Morph"
"canMoonfall"
{
"or": [
"Plasma",
"ScrewAttack",
"canInsaneJump"
]
}
{
"resourceMissingAtMost": [
{
"type": "Missile",
"count": 0
}
]
}
{
"canShineCharge": {
"usedTiles": 28,
"openEnd": 0
}
}
{
"shinespark": {
"frames": 50,
"excessFrames": 3
}
}
{
"obstaclesCleared": [
"A"
]
}
{
"or": [
"h_ClimbWithoutLava",
{
"obstaclesNotCleared": [
"B"
]
}
]
} |
|
Diagonal shinespark up the climb to break the bomb blocks to the morph tunnels on the right. A frozen Pirate can be used to stop the spark just above the bottom tunnel. Requires: {
"notable": "Behemoth Shinespark"
}
"Morph"
{
"canShineCharge": {
"usedTiles": 28,
"openEnd": 0
}
}
{
"or": [
{
"shinespark": {
"frames": 147,
"excessFrames": 124
}
},
{
"and": [
"h_ZebesIsAwake",
"canTrickyUseFrozenEnemies",
{
"shinespark": {
"frames": 24,
"excessFrames": 1
}
}
]
}
]
}
{
"obstaclesCleared": [
"A"
]
}
{
"or": [
"h_ClimbWithoutLava",
{
"obstaclesNotCleared": [
"B"
]
}
]
}Dev note: FIXME: if Zebes is awake, it is possible to farm the Pirates in the room after breaking the blocks; this also applies to the other forms of Behemoth spark in this room (as long as the lava is not active). |
|
Diagonal shinespark to break the bomb blocks to the morph tunnel on the right. Spark from the lowest platform that is only one tile from the right wall (part of the bottom right door will be on screen). From this platform, the shinespark must be done from a crouch; or, to save some energy, angle-down jump and spark at the peak of the jump (with Hi-Jump unequipped). It is possible to set up a frozen pirate on the right wall to stop the shinespark early. If the positioning is ideal, Samus will bonk the platform at the top-right of the room, saving a bit of energy. With Hi-Jump equipped, this is still possible (and with 1 less energy needed): by sparking after bonking the platform and descending a few pixels (a 3-frame window); or, more easily but requiring slightly more energy, by aiming down and sparking at the maximum height (which will result in clipping through the platform at the top-right of the room if the spark is not interrupted by running low on energy before that point). Requires: {
"notable": "Behemoth Shinespark"
}
"Morph"
{
"useFlashSuit": {}
}
{
"or": [
{
"and": [
{
"disableEquipment": "HiJump"
},
{
"shinespark": {
"frames": 127,
"excessFrames": 124
}
}
]
},
{
"and": [
"HiJump",
{
"shinespark": {
"frames": 130,
"excessFrames": 129
}
}
]
},
{
"and": [
"HiJump",
"canInsaneJump",
{
"shinespark": {
"frames": 126,
"excessFrames": 124
}
}
]
},
{
"and": [
{
"shinespark": {
"frames": 1,
"excessFrames": 1
}
},
"canTrickyUseFrozenEnemies",
"h_ZebesIsAwake"
]
}
]
}
{
"or": [
"h_ClimbWithoutLava",
"h_lavaProof",
{
"obstaclesNotCleared": [
"B"
]
}
]
}Dev note: For the frozen pirate strat, it is assumed that Samus can farm the energy after the spark, resulting in no damaging shinespark frames. FIXME: It is still possible to set up a frozen pirate, even when shinecharging on the floor. |
